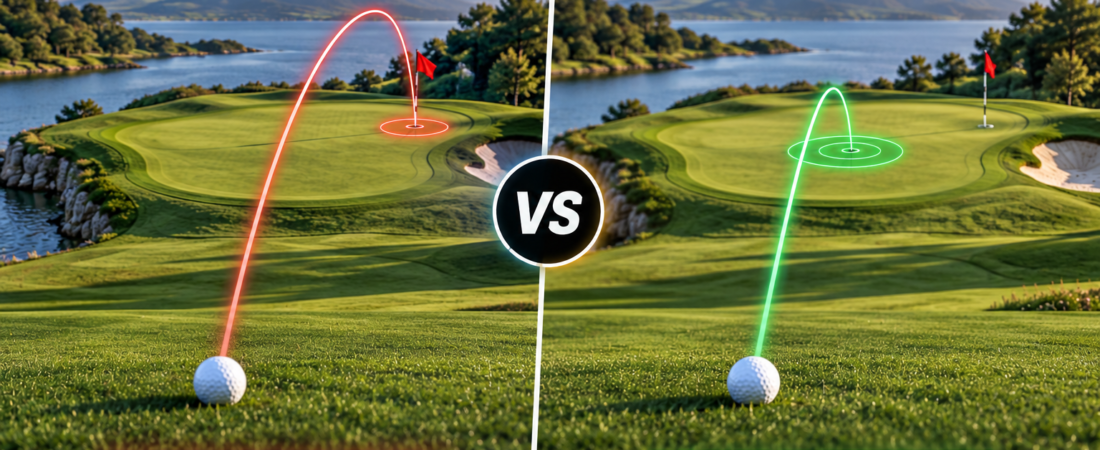
Every golfer faces the same decision when standing over an approach shot.
Should you aim directly at the flag?
Or should you aim for the center of the green?
At first glance, the answer seems obvious.
If you want to make birdies, you need to hit the ball close to the hole.
But golf is not a game where every shot finishes exactly where you aim.
Even the world’s best players miss their intended targets.
The difference between a good decision and a costly mistake often comes down to understanding where those misses are likely to finish.
Imagine two golfers facing a flag positioned just five yards from the right edge of a green.
One aims directly at the pin.
The other aims ten yards left, toward the safer portion of the putting surface.
The first golfer has a better opportunity to finish extremely close if the shot is executed perfectly.
The second golfer may have a longer birdie putt, but potentially a smaller chance of leaving a difficult short-sided recovery.
Which strategy produces the lower score over time?
And does the answer change when the approach is from 100 yards instead of 150 or 200 yards?
In this aim at the flag vs center of the green comparison, we’ll examine real PGA Tour approach statistics, professional course-management strategies, shot dispersion, pin positions, and expected strokes.
We’ll also explore why the safest target isn’t always the exact center of the green.
Quick Verdict: For most amateur golfers, aiming toward the safer portion of the green is often the better default, especially from longer distances or when the pin is near trouble. However, a well-positioned flag, shorter approach distance, and tighter shot dispersion can make a more aggressive target worthwhile.
1. Aim at the Flag vs Center of the Green: Quick Comparison
| Factor | Aim at the Flag | Aim at Green Center |
|---|---|---|
| Primary objective | Shorter birdie putt | Larger margin for error |
| Ideal outcome | Very close approach | Safe green in regulation |
| Risk with edge pins | Often higher | Often lower |
| Short-sided miss risk | Can be significant | Usually easier to manage |
| 100-yard approach | Sometimes attractive | Still useful |
| 150-yard approach | Requires more caution | Strong default |
| 200-yard approach | Often demanding | Usually safer |
| Best for | Favorable pins and tight dispersion | Difficult pins and wider dispersion |
The most important distinction is not aggressive versus defensive golf.
It’s whether the expected benefit of finishing closer outweighs the expected cost of missing in a dangerous location.
2. What PGA Tour Statistics Tell Us About Approach Accuracy
Professional golfers are extraordinarily skilled, yet their average approach shots still finish farther from the hole than many amateurs imagine.
Consider these published PGA Tour statistics for Matt Fitzpatrick.
| Approach Distance Category | Average Proximity to Hole |
|---|---|
| 75–100 yards | 13 ft 5 in |
| 100–125 yards | 20 ft 11 in |
| 125–150 yards | 22 ft 5 in |
| 150–175 yards | 26 ft 8 in |
| 175–200 yards | 32 ft 2 in |
| 200–225 yards | 37 ft 6 in |
Source: PGA Tour player statistics. These are reported distance bands, not results from exactly 100, 150, or 200 yards.
These numbers reveal something important.
Even a highly skilled professional doesn’t consistently leave every wedge or iron shot inside ten feet.
And as approach distance increases, proximity generally becomes worse.
Why This Changes Target Selection
Suppose a golfer has a 100-yard approach to a front-right pin.
A reasonably accurate wedge player might have enough control to select a target relatively close to the hole.
Now move the same golfer back to 200 yards.
The likely landing pattern becomes wider.
The same aggressive target could now send a larger portion of shots into a bunker, rough, or water.
The correct target should change with the golfer’s dispersion—not merely with the flag’s position.
The Compareason Insight: The farther you are from the green, the more important it becomes to aim for an area that accommodates your normal misses.
3. What Scottie Scheffler Actually Does
One of the most useful professional examples is Scottie Scheffler.
In a PGA Tour interview, Scheffler explained that his approach strategy is often more conservative than his strategy off the tee.
He also described how his target selection changes depending on club choice, comfort, and pin difficulty.
In another published interview, he explained that he generally aims away from short-sided pins, while a wedge may allow him to target somewhere between the green’s center and the hole.
This is a significant distinction.
Scheffler isn’t simply trying to hit every approach shot as close as possible.
He’s selecting targets that give him favorable outcomes across a range of possible strikes.
What His Shot Patterns Reveal
A Golf Digest analysis of 1,353 shots from Scheffler’s 2024 run found a consistent pattern of avoiding the dangerous side of the green.
For back-left and back-right pin positions, the analysis reported short-sided finishing rates of approximately 2.82% and 3.23%, respectively.
Those figures came from a particular analyzed stretch, not a universal career statistic.
Still, the principle is clear.
He often accepts a longer putt rather than exposing himself to a difficult recovery.
The Lesson for Amateur Golfers
The key isn’t to copy Scheffler’s exact target.
It’s to copy his decision-making process.
Consider the pin, identify the dangerous miss, evaluate your normal dispersion, and select the target that offers the best expected outcome.
Our Take: The world’s best ball-strikers don’t need to attack every flag to score well. Their ability to choose the right target is part of what makes them elite.
4. The 100-Yard Approach: When Aggressive Golf Can Make Sense
A 100-yard approach is very different from a 200-yard approach.
Many golfers use a wedge from this distance, allowing a relatively high trajectory and potentially more stopping power.
But the correct target still depends on the lie, pin position, wind, green firmness, and the player’s ability.
Scenario A: Middle Pin, No Significant Trouble
Imagine a green that is 30 yards wide.
The flag is near the center.
There are no severe hazards immediately surrounding the putting surface.
Aiming directly at the flag may be a sensible decision.
Why?
Because the flag is already positioned in a relatively safe part of the green.
There’s no meaningful conflict between an aggressive target and a conservative one.
Recommended Target: Near the flag.
Scenario B: Pin Five Yards From Water
Now imagine the flag is five yards from the right edge, with water immediately beyond it.
Aiming directly at the pin creates additional risk.
A golfer whose normal shot dispersion extends ten yards right of the target may expose many shots to the hazard.
Even from 100 yards, moving the target toward the center could be the better decision.
Recommended Target: Away from the water, potentially between the flag and center.
Scenario C: Front Pin Behind a Bunker
Suppose the flag is only four yards beyond a front bunker.
A shot that lands short may finish in the sand.
A slightly longer shot may leave a manageable putt.
Here, aiming at the flag’s horizontal position might be reasonable, but selecting a carry distance beyond the pin could be safer.
Recommended Target: A landing area safely beyond the front hazard.
The 100-Yard Principle
From shorter distances, golfers may be able to take advantage of a smaller dispersion pattern.
But shorter distance doesn’t automatically justify attacking every pin.
The Compareason Insight: At 100 yards, be aggressive when the pin is accessible—not merely because you have a wedge.
5. The 150-Yard Approach: Where Target Selection Becomes More Important
At 150 yards, many recreational golfers are using a mid-iron or longer club.
Compared with a wedge, the shot may have a wider dispersion pattern and a less predictable landing and stopping distance.
This makes target selection more important.
Scenario A: Center Pin
If the flag is near the center of the green, the decision is relatively simple.
Aim near the flag while accounting for your normal shot shape and typical miss.
Scenario B: Right-Side Pin
Suppose the pin is five yards from the right edge.
A golfer who frequently misses right may face a high risk of finishing short-sided.
Moving the target left can reduce that risk.
A golfer whose normal miss is left may evaluate the hole differently.
Scenario C: Back Pin
A back pin creates a different problem.
If the golfer selects a club that carries all the way to the hole, a slightly long strike may finish beyond the green.
Depending on the terrain, that could be a difficult recovery.
Aiming for a landing distance short of the flag may create a better overall result.
Why 150 Yards Is a Useful Decision Point
There is nothing mathematically special about exactly 150 yards.
But for many golfers, it’s a distance where the difference between a perfect shot and a typical shot becomes more consequential.
The appropriate strategy depends on individual dispersion.
Our Take: At 150 yards, start with the safest useful landing area. Move toward the pin only when your shot pattern and the hole conditions justify it.
6. The 200-Yard Approach: Why the Center Often Wins
A 200-yard approach introduces greater uncertainty for most amateur golfers.
Many players are using a long iron, hybrid, or fairway wood.
These clubs can produce larger variations in carry distance, launch, and directional control.
The primary objective may shift from creating a short birdie putt to finding a playable position for the next shot.
Scenario A: Wide Green, Middle Pin
Aiming near the center is a logical starting point.
A reasonably wide landing area provides room for imperfect shots.
Scenario B: Narrow Green With Trouble on Both Sides
The safest target may be a particular section of the green rather than its geometric center.
For a golfer with substantial dispersion, even attempting to hit the green may carry significant risk.
In some cases, a planned layup or a safe miss short of the green can be worth considering.
Scenario C: Back-Right Pin Over Water
Aiming directly at the flag may require both excellent distance control and precise directional accuracy.
If the player cannot reliably carry the hazard and hold the green, a more conservative target is often appropriate.
The 200-Yard Principle
The objective isn’t to eliminate aggression.
It’s to recognize that a wider shot pattern changes the expected outcome of aggressive aiming.
The Compareason Insight: From 200 yards, the safest scoring strategy may be to protect the next shot rather than maximize the chance of a close birdie putt.
7. The Compareason Calculation: How Much Is a Safe Target Worth?
Let’s move beyond general advice and calculate the scoring consequences of two different aiming strategies.
We’ll use a hypothetical 150-yard approach to a green with a right-side pin.
The golfer has two choices.
Strategy A: Aim at the Flag
This creates more opportunities for a short birdie putt but exposes the player to a dangerous miss on the right.
Strategy B: Aim Toward the Safe Center
This may leave longer putts but reduces the likelihood of a difficult short-sided recovery.
Hypothetical Outcomes Over 100 Approaches
| Result | Aim at Flag | Aim Safe Center |
|---|---|---|
| Close putt, approximately 10 ft | 25% | 10% |
| Longer putt, approximately 30 ft | 40% | 65% |
| Manageable missed green | 20% | 20% |
| Difficult short-sided miss | 15% | 5% |
These probabilities are illustrative, not PGA Tour or amateur performance data.
Assigning Expected Strokes Remaining
We’ll use simplified assumptions for the number of strokes required to finish after the approach.
| Result | Expected strokes remaining |
|---|---|
| 10-foot putt | 1.60 |
| 30-foot putt | 2.00 |
| Manageable missed green | 2.50 |
| Difficult short-sided miss | 3.00 |
The putting assumptions are broadly consistent with historical PGA Tour strokes-gained baselines. The two recovery-shot values are illustrative and depend heavily on the lie, terrain, and golfer.
Strategy A: Aim at the Flag
(0.25 × 1.60) + (0.40 × 2.00) + (0.20 × 2.50) + (0.15 × 3.00)
= 0.40 + 0.80 + 0.50 + 0.45
= 2.15 expected strokes remaining.
Including the approach shot:
3.15 expected strokes to finish.
Strategy B: Aim Toward the Safe Center
(0.10 × 1.60) + (0.65 × 2.00) + (0.20 × 2.50) + (0.05 × 3.00)
= 0.16 + 1.30 + 0.50 + 0.15
= 2.11 expected strokes remaining.
Including the approach shot:
3.11 expected strokes to finish.
The Result
| Measurement | Aim at Flag | Aim Safe Center |
|---|---|---|
| Expected strokes remaining | 2.15 | 2.11 |
| Expected strokes including approach | 3.15 | 3.11 |
Safe center advantage: 0.04 strokes per approach.
Over ten similar approaches, the expected advantage would be 0.40 strokes.
That’s not enormous.
But the calculation reveals something important.
The flag strategy creates more close putts.
The safe-center strategy avoids enough difficult recoveries to produce a slightly better expected score.
This is not proof that aiming at the center always wins. The result depends entirely on the assumed probabilities and stroke values.
8. Break-Even Analysis: When Should You Attack the Pin?
Now let’s make the comparison more interesting.
In the previous model, aiming at the flag produces 15% difficult short-sided misses.
Aiming toward the center produces only 5%.
But what if a highly skilled golfer can attack the pin without increasing that risk as much?
Let’s keep the other probabilities in the same model, and allow the flag strategy’s difficult-miss rate to change.
Any probability removed from difficult misses is reassigned to the manageable-miss category.
Under those assumptions:
Expected strokes remaining = 2.075 + (0.50 × difficult-miss probability).
The safe-center strategy remains at 2.11 expected strokes remaining.
To break even:
2.075 + 0.50p = 2.11
p = 0.07, or 7%.
The Break-Even Point
If the flag strategy’s difficult-miss probability falls below 7%, it becomes better than the safe-center strategy in this simplified model.
| Difficult-miss probability when attacking flag | Expected total strokes | Better strategy |
|---|---|---|
| 15% | 3.15 | Safe center |
| 10% | 3.125 | Safe center |
| 7% | 3.11 | Tie |
| 5% | 3.10 | Flag |
| 3% | 3.09 | Flag |
This is not a universal 7% rule.
It is the break-even point for the specific assumptions in our example.
The real threshold depends on the golfer’s dispersion, pin location, severity of trouble, and putting ability.
The Compareason Insight: Aggressive aiming becomes worthwhile when the probability and cost of a bad miss are sufficiently low—not simply when the golfer feels confident.
9. Pin Position Changes the Entire Strategy
Aiming at the center is a useful starting point, but different pin positions require different decisions.
Front Pin
A front pin often creates a risk of leaving the ball short of the green.
If there’s a bunker or steep slope in front, a shot that lands slightly beyond the hole may be safer.
The golfer should evaluate the minimum carry needed to reach the safe landing area.
Back Pin
A back pin creates the opposite risk.
A slightly long shot may finish beyond the green, possibly leaving a difficult downhill chip.
Selecting a target short of the hole can be sensible.
Left Pin
For a right-handed golfer with a stock fade, the left side of the green may be a less comfortable target depending on starting direction and dispersion.
Aiming farther right can create a larger safety margin.
But the golfer should use their actual shot pattern rather than assuming every fade behaves identically.
Right Pin
A golfer with a reliable fade may be able to use their normal curvature toward a right-side pin.
However, aiming directly at the flag can still be dangerous if a slightly excessive fade finishes in trouble.
Center Pin
A center pin often allows the golfer to be more aggressive without substantially increasing risk.
This is one reason central pin locations can be excellent scoring opportunities.
Scottie Scheffler’s Example
A published analysis of Scheffler’s approach strategy found that he frequently selected safer landing zones based on pin position, rather than consistently aiming directly at the flag.
That approach combines course management with the player’s natural ball flight.
10. Why the Exact Center Isn’t Always the Best Target
Here’s where the traditional advice becomes incomplete.
“Always aim at the center of the green” sounds sensible.
But the geometric center isn’t always the safest or most valuable landing area.
Consider a green with a large bunker on the left and an open fairway collection area on the right.
The geometric center may not be the ideal target for a golfer whose typical miss is left.
Moving the target slightly right could reduce the probability of finishing in the bunker.
Three Different Centers
Geometric Center: The physical middle of the green.
Safe Center: The part of the green that provides the greatest margin against costly misses.
Scoring Target: The location that produces the lowest expected number of strokes, considering all likely outcomes.
These three points may be different.
Example
Suppose a green is 30 yards wide.
The flag is five yards from the left edge.
A bunker protects the left side, while the right side has open short grass.
A golfer’s shot dispersion is slightly biased left.
Aiming at the exact center may be reasonable.
But aiming a few yards right of center could provide a better margin against the bunker.
That may be the smarter scoring target even though it creates a longer average putt.
The Compareason Insight: The ideal target is not necessarily the flag or the center. It’s the location that best balances proximity with the consequences of a miss.
11. How Green Speed, Slope, and Undulation Change the Target
Distance and pin position are important, but they don’t tell the entire story.
Two approach shots can finish exactly 15 feet from the hole and still produce very different putting opportunities.
One may leave a relatively straight uphill putt.
The other may leave a fast downhill putt with several feet of break.
The distance is identical.
The expected difficulty may not be.
Green Speed Changes the Consequences of a Miss
Green speed is commonly measured using a Stimpmeter.
A higher reading generally indicates a faster putting surface under the measurement conditions.
Faster greens can make certain downhill and sidehill putts more demanding because the ball may travel farther when its speed is slightly misjudged.
However, green speed alone does not determine putting difficulty.
Slope, surface conditions, grain, and the player’s ability all matter.
Example: Two 15-Foot Putts
Imagine a flag positioned near the back of a sloping green.
A shot finishing 15 feet below the hole leaves an uphill putt.
Another shot finishing 15 feet above the hole leaves a downhill putt.
The downhill putt may require more delicate speed control and could create greater three-putt risk if the ball travels too far beyond the hole.
That doesn’t mean uphill putts are always easier to hole.
The exact difficulty depends on the slope and break.
But the direction of the next putt can influence the value of an approach target.
Understanding Undulation
A green may contain multiple slopes, ridges, and tiers.
These features can change both the first bounce and the subsequent roll.
For example:
- A shot landing on an upslope may stop more quickly.
- A shot landing on a downslope may release farther.
- A ridge can redirect the ball away from the hole.
- A false front can cause a short approach to roll off the green.
- A tier can make a long putt substantially more difficult.
This is why a target that looks safe from the fairway may not be the best scoring position.
A Hypothetical Expected-Strokes Example
Suppose a golfer faces two possible landing areas.
| Landing Position | Distance From Hole | Assumed Expected Putts |
|---|---|---|
| Below the hole, gentle uphill | 18 feet | 1.85 |
| Above the hole, steep downhill | 12 feet | 2.05 |
These values are hypothetical illustrations, not measured PGA Tour statistics.
Under these assumptions, the longer uphill putt is actually the better result.
The important point is that proximity alone cannot fully describe putting difficulty.
The Compareason Insight
The best approach shot doesn’t always finish closest to the flag. Sometimes it finishes in the position that offers the easiest next stroke.
12. How Shot Dispersion Should Determine Your Target
One of the biggest differences between professional golfers and recreational players is the size and predictability of their shot patterns.
A golfer who consistently hits a 150-yard iron within a relatively narrow landing area can make different decisions from someone whose shots scatter across a much wider area.
Understanding Your Dispersion Pattern
Imagine hitting 30 shots with the same club.
Some finish left.
Some finish right.
Some carry farther than expected.
Others finish short.
Together, these results create a dispersion pattern.
The objective is not to assume every shot will finish at the target.
It’s to choose a target that accommodates the likely outcomes.
Example: Two Golfers From 150 Yards
Golfer A has a relatively tight dispersion pattern.
Golfer B has a much wider pattern.
Suppose a right-side pin is five yards from a bunker.
Golfer A may be able to aim closer to the flag without exposing a large proportion of shots to the hazard.
Golfer B may need to aim considerably farther left.
Both golfers are making rational decisions based on their abilities.
Dispersion Width Matters More Than Handicap Labels
It’s tempting to create fixed rules such as:
- Scratch golfers should attack the flag.
- 10-handicap golfers should aim at the center.
- 20-handicap golfers should always play conservatively.
But those rules are too simplistic.
Two golfers with identical handicaps may have very different strengths.
One may be an excellent iron player but struggle with putting.
Another may have poor approach accuracy but an exceptional short game.
The better target depends on actual performance.
The Role of Carry Distance
Lateral dispersion is only part of the picture.
Distance control matters too.
A golfer who consistently misses short may need to select a club that carries beyond the front of the green.
A golfer whose long misses frequently reach trouble may need a more conservative club and target combination.
Our Take: Measure your normal misses and build your strategy around them. Don’t choose targets based on the shot you hope to hit.
13. The Compareason Perspective: Stability Before Aggression
At Compareason, we believe that many amateur golfers focus too much on the perfect outcome of an approach shot.
They imagine the ball flying directly toward the flag and stopping within a few feet.
But scoring well requires evaluating more than the perfect shot.
It requires understanding the likely misses.
Our Position
For most recreational golfers, a predictable landing pattern and a safe target are more valuable than repeatedly attempting difficult pin-seeking shots.
This does not mean golfers should always aim at the center.
It means they should understand their own dispersion before deciding how aggressively to play.
A golfer with excellent wedge control from 100 yards may have good reasons to attack an accessible flag.
The same golfer from 200 yards may need to select a much safer target.
Why We Disagree With One-Rule Course Management
Some golfers believe every approach should be aimed at the flag.
Others believe the center of the green should always be the target.
We believe both approaches are incomplete.
A better strategy considers five questions:
- How far am I from the green?
- How wide is my typical shot dispersion?
- Where is the most costly miss?
- Where will the easiest next shot be?
- Does moving toward the flag improve my expected score enough to justify the risk?
These questions lead to a more useful decision than simply choosing between the flag and the geometric center.
The Teaching Perspective
For golfers developing their approach play, consistency should generally come before aggressive target selection.
First, develop reliable contact and distance control.
Then learn where your typical shots finish.
Finally, adjust targets according to the hole’s hazards and the expected difficulty of the next shot.
This is an editorial coaching perspective, not a claim that every amateur golfer will achieve the same results.
Our Core Principle
Don’t aim where your perfect shot should finish. Aim where your normal collection of shots produces the best score.
That is the foundation of intelligent course management.
14. The Compareason 30-Shot Approach Test
How can you determine whether aiming at the flag or center of the green works better for your game?
You can conduct a simple practice test.
The objective is to measure actual shot patterns rather than rely on assumptions.
Step 1: Choose a Distance
Start with a distance you frequently encounter.
For example:
- 100 yards
- 150 yards
- 200 yards
Test one distance at a time.
Step 2: Select Two Targets
Choose a flag near one side of the green.
Identify a safer target toward the middle of the putting surface.
Make sure both targets are visible and clearly defined.
Step 3: Hit 30 Shots
Hit 15 shots aiming at the flag.
Hit another 15 toward the safer target.
Alternate between the two strategies in small groups to reduce fatigue and order effects.
Record:
- Carry distance
- Final ball position
- Distance from the hole
- Green hit or miss
- Whether the ball finishes short-sided
- Whether a hazard or penalty is involved
Step 4: Evaluate the Results
Don’t judge the strategies solely by the closest shot.
Instead, compare:
- Average proximity
- Green-in-regulation percentage
- Serious-miss frequency
- Average expected strokes remaining
If the facility permits, finish each ball into the hole and record the actual strokes.
Example Scorecard
| Measurement | Aim at Flag | Aim Safe Center |
|---|---|---|
| Shots | 15 | 15 |
| Greens hit | 8 | 11 |
| Within 10 feet | 4 | 2 |
| Difficult misses | 4 | 1 |
| Average strokes to finish | 3.27 | 3.07 |
These results are hypothetical and illustrate how to organize the test.
In this example, the flag strategy produces more close approaches.
But the safer strategy produces fewer difficult misses and a lower average score.
Repeat the Test
Fifteen shots per strategy is not enough to establish a reliable long-term performance difference.
Repeat the test on different days.
Use different pin positions.
Compare performance at multiple distances.
The goal is to identify patterns that remain consistent over time.
The Compareason Insight: The best target is the one that produces the lowest average score across many shots—not the one that produces the closest single approach.
15. Frequently Asked Questions
Should amateur golfers always aim at the center of the green?
No. The center is a useful default, especially when the pin is near trouble, but the ideal target depends on approach distance, shot dispersion, green shape, and the consequences of missing.
When should I aim directly at the flag?
Aiming at the flag can make sense when the pin is accessible, the surrounding area is relatively safe, and your normal dispersion pattern supports the decision.
Should I attack pins from 100 yards?
Sometimes. A shorter wedge approach may provide better distance and directional control, but a pin close to water or a bunker may still require a conservative target.
Is aiming at the center better from 150 yards?
For many recreational golfers, aiming toward the safer portion of the green is a sensible starting point. However, individual dispersion and pin location should determine the final target.
What should I aim for from 200 yards?
From 200 yards, most recreational golfers should prioritize a playable landing area and avoid severe hazards. Depending on the hole, that may mean the center of the green, a safe side, or even a planned layup.
Do PGA Tour players aim directly at every flag?
No. Professional golfers adjust their targets according to club selection, pin position, hazards, and expected scoring outcomes.
Why do professional golfers sometimes leave long birdie putts?
Because aiming for a safer portion of the green can reduce the risk of difficult recovery shots. A longer birdie putt may be preferable to a short-sided miss.
Is a 20-foot uphill putt better than a 10-foot downhill putt?
It depends on the severity of the slope, green speed, break, and player. In some situations, a longer uphill putt may be easier to control, but it is not universally the better result.
What is shot dispersion in golf?
Shot dispersion describes how a golfer’s shots are distributed around an intended target. It includes directional and distance variation.
Does hitting more greens always lower scores?
Hitting more greens is generally beneficial, but the quality of the resulting positions also matters. A green hit with a difficult putt may sometimes be less favorable than a simple recovery from just off the green.
What is the safest target on a green?
The safest target is the area that provides the greatest practical margin against costly misses, considering the golfer’s dispersion and the surrounding hazards.
Can better course management lower scores without changing my swing?
Yes. Choosing better targets, avoiding unnecessary risks, and accounting for normal miss patterns can improve scoring opportunities without requiring a complete swing change.
16. The Compareason Verdict: Aim at the Flag vs Center of the Green
Overall Winner for Most Recreational Golfers: The Safer Portion of the Green
For most recreational golfers, especially from longer approach distances, aiming toward a safer landing area is often the stronger scoring strategy.
The advantage comes from reducing costly misses.
However, the geometric center of the green is not always the ideal target.
The correct location depends on shot dispersion, pin position, green contours, and the difficulty of the next stroke.
The Distance-Based Verdict
| Approach Distance | Recommended Starting Strategy |
|---|---|
| 100 yards | Attack accessible pins; avoid severe trouble |
| 150 yards | Favor the safe center or a target between center and flag |
| 200 yards | Prioritize a large, playable landing area |
These are general starting points, not universal distance rules.
A highly accurate player may choose more aggressive targets.
A golfer with wide dispersion may need to be more conservative even from 100 yards.
The Compareason Calculation
Our hypothetical 150-yard example produced:
| Strategy | Expected Total Strokes |
|---|---|
| Aim at flag | 3.15 |
| Aim toward safe center | 3.11 |
The safer strategy saved 0.04 expected strokes per approach.
The difference was small, but meaningful within the assumptions of the model.
More importantly, the model showed why the safer strategy won.
It reduced difficult short-sided misses.
Our break-even calculation also demonstrated that aggressive aiming can become preferable when the probability of a costly miss is sufficiently low.
What the Professionals Teach Us
PGA Tour approach statistics demonstrate that even elite golfers have meaningful dispersion.
Professional strategy therefore involves more than simply aiming at the hole.
Players such as Scottie Scheffler illustrate the value of selecting targets based on pin position, club choice, and the consequences of missing.
The lesson for amateurs isn’t to imitate a professional’s exact landing target.
It’s to adopt a more disciplined decision-making process.
Best Choice for Beginners and Higher-Handicap Golfers
Start with the safer portion of the green.
Focus on solid contact, appropriate club selection, and avoiding penalties or difficult short-sided misses.
A 25-foot birdie putt is often a better outcome than an unnecessary recovery from a hazard.
Best Choice for Lower-Handicap Golfers
Use your actual dispersion pattern to select more precise targets.
Attack accessible pins when the scoring benefit justifies the risk.
Remain conservative when hazards or difficult recovery positions make misses expensive.
Our Final Recommendation
Before every approach shot, ask yourself three questions.
Where is the safest useful landing area?
Where does my normal miss finish?
Will aiming closer to the flag improve my expected score enough to justify the risk?
Those questions are more valuable than blindly aiming at either the flag or the center.
From 100 yards, you may have an opportunity to attack.
From 150 yards, dispersion becomes increasingly important.
From 200 yards, avoiding severe misses may be the priority.
But the final decision should always reflect your actual skill and the conditions in front of you.
The Compareason Verdict: The best target isn’t automatically the flag or the center of the green. It’s the landing area that gives your entire shot pattern—not just your perfect shot—the best chance of producing a lower score.
Compare with Reason.